Posts

Icelandic Bind-Off Tutorial

Image
The Icelandic Bind-Off is a relatively easy bind off to work and gives a stretchy edge. It creates a slightly rounded and bulky edge, so works quite well when used with garter stitch.  It closely resembles the Twisted German Cast-On, so can be paired with this, if matching edges are important in your project. Here's a video tutorial for the Icelandic Bind-Off and for those that prefer a photo tutorial, just scroll on down. 1. Knit the first stitch. 2. Slip back to left-hand needle without rotating the stitch. You can leave the right-hand needle tip in at the front. If it comes out, then just re-insert the right-hand needle in this stitch purlwise.  3. Whilst still in that first stitch, insert the right-hand needle into the second stitch on the needle and pull it through the first stitch. There should just be one strand on the right-hand needle at this point. 4. Knit this strand. 5. Take the two stitches off the left hand needle. Repeat steps 2 - 5 until all stitches have been b

New Pattern: Gentle Blooms

Image
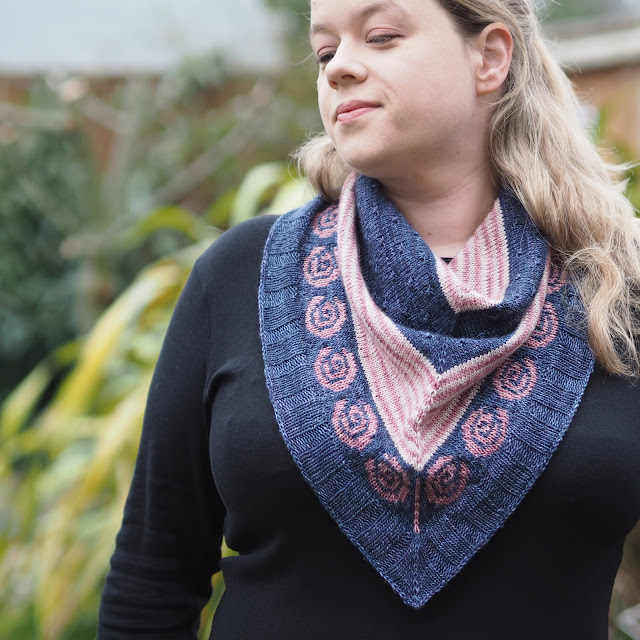
Gentle Blooms is perfect for using up those special skeins of yarn. Gentle Blooms is a bandana-style cowlette, which means you get the beauty and fun of a shawl at a small scale but it’s easy to wear and will stay in position. The design came about as I had quite a lot of yarn leftover from my Vertices Unite . The yarn was a gorgeous merino and silk blend, and I didn't want to leave it languishing in my stash. Maybe you've got some gorgeous yarns in your stash that aren't enough for shawl. The quantities needed are - MC: Navy - 225m [247yds] CC1: Cream - 85m [93yds] CC2: Pink - 97m [107yds] As usual, I wanted the knitting to be enjoyable, so the vast majority is knit and purl. There is a handful of stranded knitting rows for the "Gentle Blooms". The positioning gives the biggest impact for quite a small section of stranded knitting. Or as they say "the biggest bang for your buck!". Since it's all about the details on a project like this, the neckline

Gauge Database

Image
Let's talk about gauge. I know a lot of you dislike making a gauge swatch. I, personally, have no issues with it, as it gives me an opportunity to try out my yarn and I like to knit. It may have something to do whether we lean towards process or product knitting. If you're more of a product knitter, then I can see why you perhaps feel like the gauge swatch is a waste of time.  We invest a lot of time into our knits and it's not a pleasant feeling to get to the end of the process and realise that it doesn't fit or we've run short on yarn. I've been making swatches for a long, long time and for most of that time, I've been writing down what the measurements are. This has saved me a lot of time on swatching. Just one thing to be aware of is our tension changes, so a swatch made 5 years ago is very unlikely to be exactly the same as what we would be knitting now. Let me give you an example of where this database comes in handy. I'm making a shawl and the gau

Substituting Yarn in a Project

Image
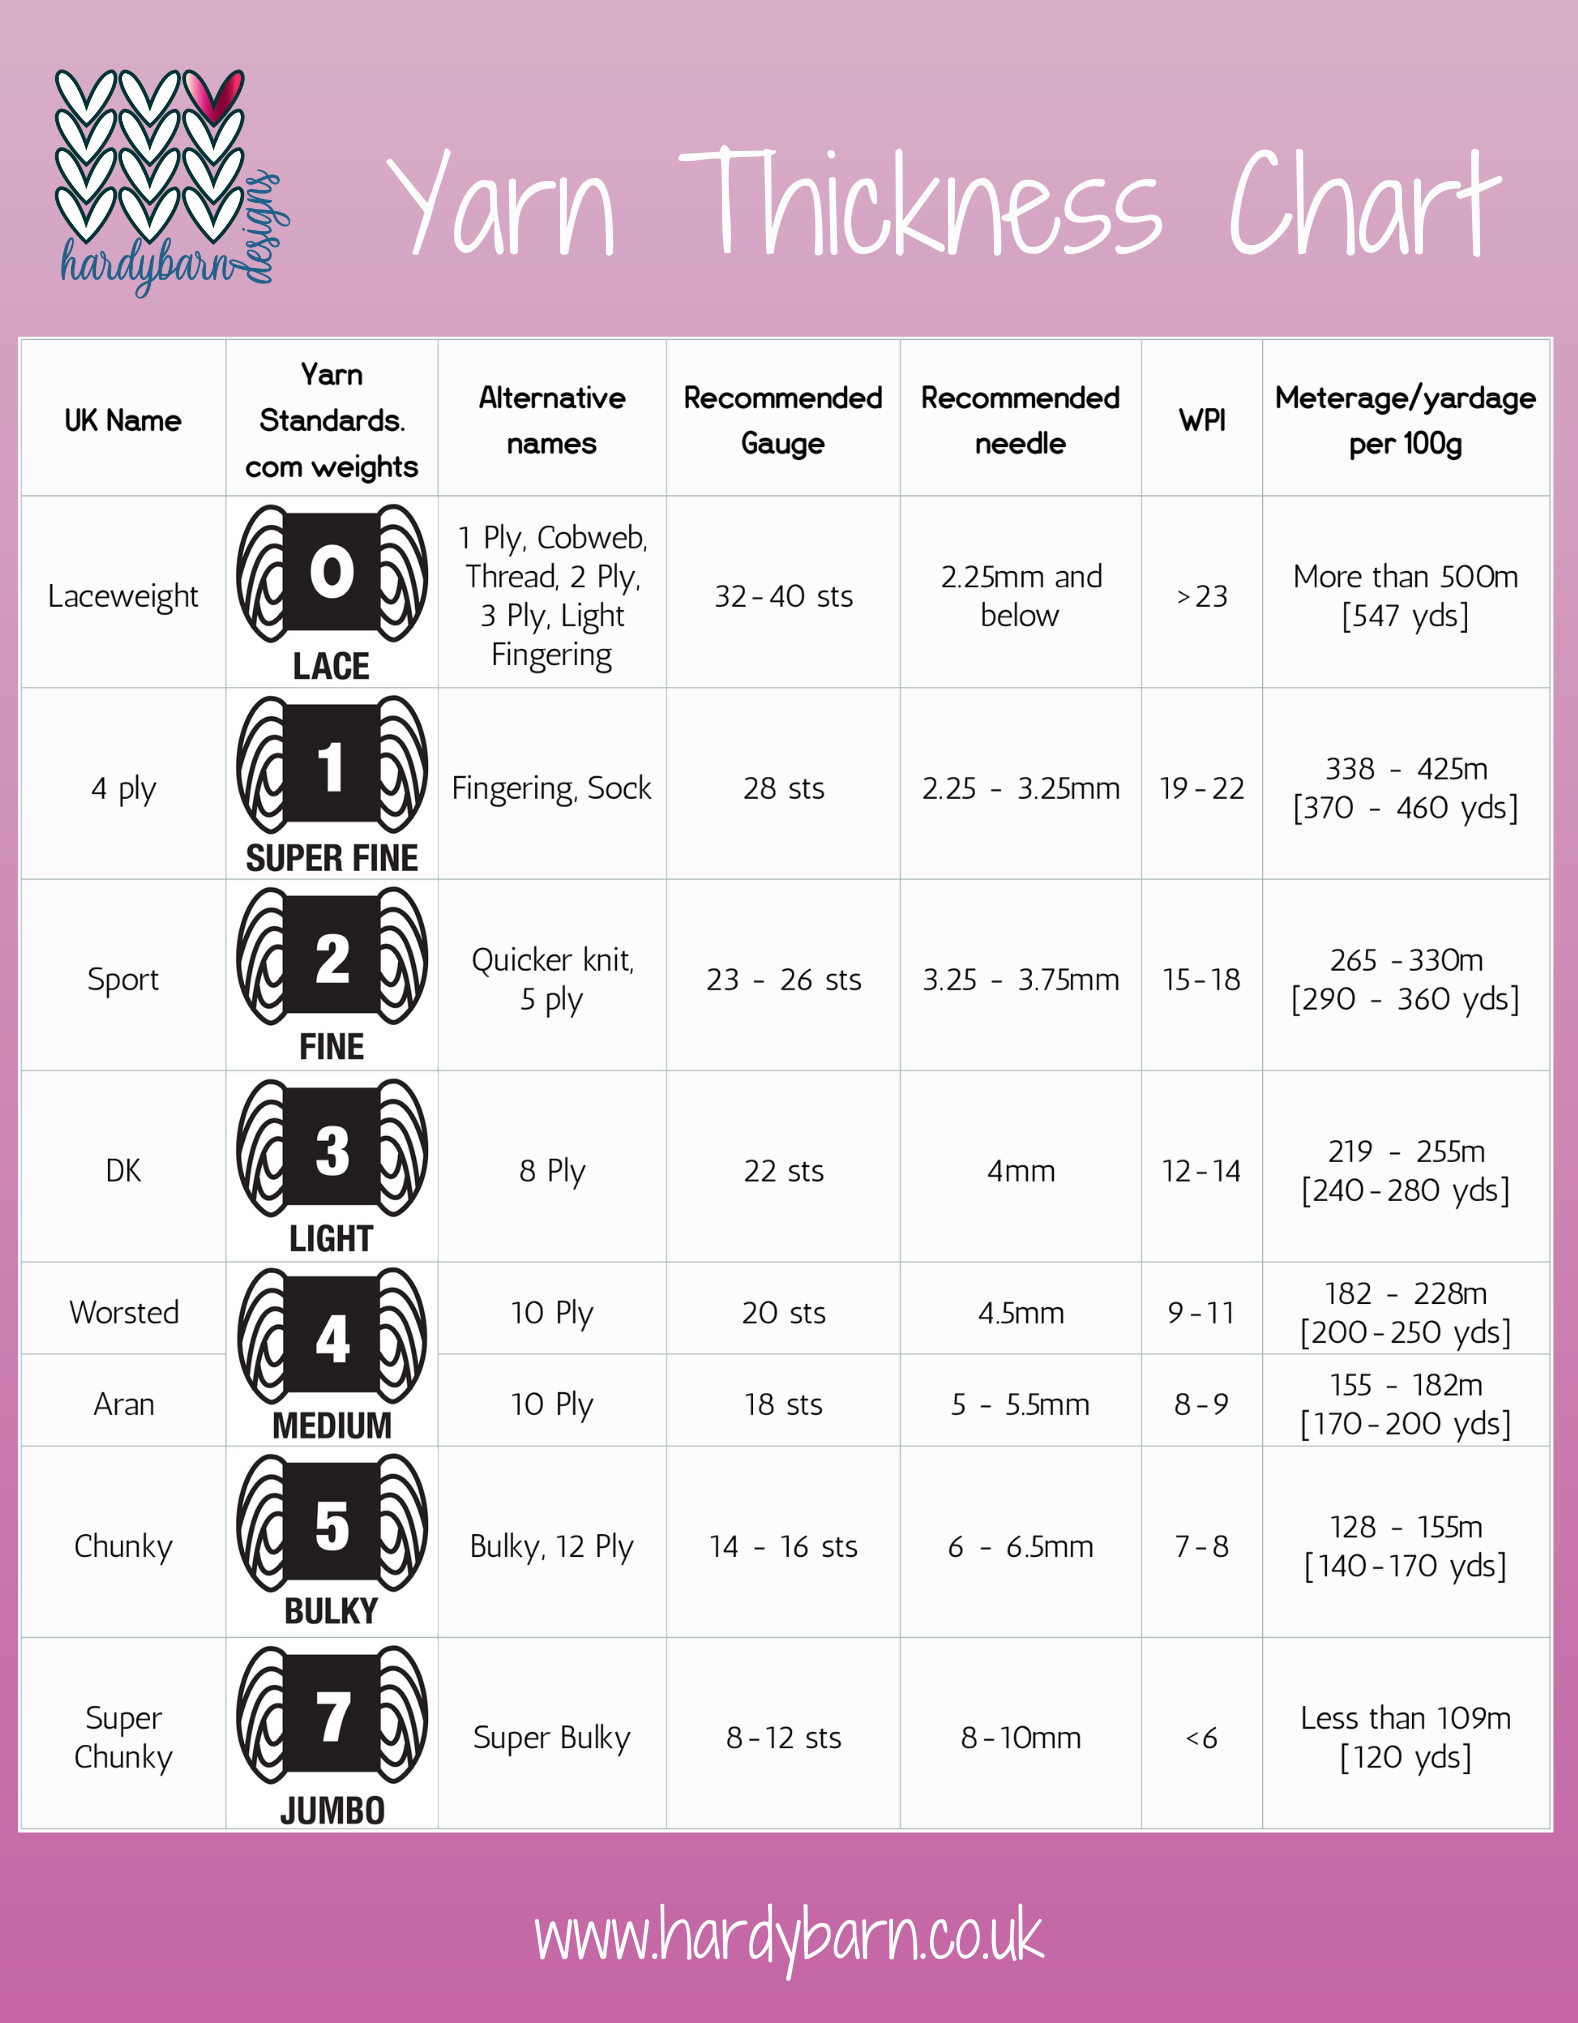
So you’ve chosen your pattern, but either you don’t want to use the recommended yarn or you can’t find it to buy. This does not mean you are stuck. Many knitters, especially when they are just learning to knit, get stuck on the idea that you can only use the yarn that the pattern is written with. There are, occasionally, a few projects where it can be quite hard to find an alternative but that is very rare. There are a few factors that you want to think about when changing yarn.  Yarn Thickness The main one is the thickness of the yarn. This is the one factor that you absolutely have to consider. Everything else that I discuss below helps to hone your decision down but yarn thickness is at the core of a project. If you use a thicker yarn, it could make the fabric too dense and often make it impossible to match the gauge of the pattern. If you use a thinner yarn, then it will be more open and airy than intended; there’s more scope with this but some projects such as toys and bl

New Pattern: Jupon

Image
There's a new pattern out. I say new but for me, this is one of my oldest patterns, that I have used many times and I thought it was about time I shared it for you all to try. I don't know about you but I love the smooshy, slipped stitch heel on a sock. Covering the whole sock in this pattern, creates extra thickness and just feels so warm and cosy. The pattern is easier to work in the round than on the heel flap, so it's quite a relaxing knit to work too. Jupon are worked from the top down and the name, Jupon, is derived from the slipped stitches used in the sock. Jupon is a type of slip (petticoat). As you can see from the collage below, I've worked this pattern a few times using different types of yarn. It seems to work well with all types of yarn dyeing - plain, semi-solid, speckles, self-striping, variegated. The slipped stitch pattern covers most of the sock even down to the tips of the toes. Use the introductory discount code JUPON for a 15% discount until midnig

Afterthought Heels

Image
I don't know whether you're the same but I've always been disappointed with the fit of an afterthought heel. I think this is because I have a very high instep and the heel just isn't deep enough. I'm going to talk a bit about "maths and fit" in this first section, but if you're looking for the tutorial on how to put in your afterthought heel then just slide down to the bottom. Afterthought heel fit I played about with the maths a bit to see why they don't work for me. My heel diagonal is about 30cm [11 7/8"]. You'd expect to have a bit of negative ease around the heel diagonal - 10 -15% is a good range - so I want it to be somewhere between 25.6 - 27cm [10.1 -10.7"] in circumference.  If I were to work a basic afterthought heel, that outside measurement would be about 12.5cm [5"] (I worked out this number by counting the rows in the afterthought heel and multiply by 2; plus the width of the final kitchener stitches) plus half of

Tutorial: M1L and M1R Increases

Image
So your pattern tells you to increase at both ends of the row, but it fails to tell you how. There are quite a number of different ways to create increases in knitting and some will suit different situations better than others. Today I'm going to talk about one of the lifted increases - make one left or right.  Make one left (m1l) and make one right (m1r) are mirror images of each other, so are perfect when you need to make two increases on the same row. If you want to see the details of the swatch below, just scroll to the bottom of the post. Benefits Blend into the knitting more than a lot of other increases Don't create large holes under the stitch, so are neater They are mirrored versions, so look good worked in pairs Downsides Can be a little tricky (tight) to work sometimes but does gets easier with practice As it's a lifted increase, they pull up the stitches from below, which can cause distortion Other increases can be faster to work  Here's the video tutorial b