Creative Filofax
I'm not entirely sure why but I dug my Filofax out of the cupboard and have started using it again. I thought I'd try and add a bit of creativity to it and make it more personal.
I bought some washi tape and stickers from Riky and Nina.
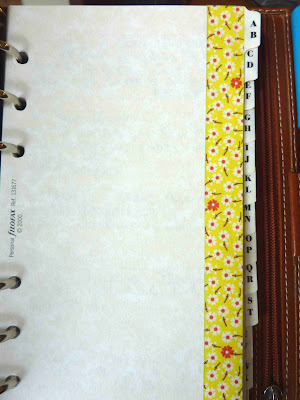
Then I had a little fun with the washi tape. I bought a cute panda one and some pretty yellow flower tape.
I bought some washi tape and stickers from Riky and Nina.
 |
| Washi tape and stickers |
The packs of stickers are great if you just want a little bit for journalling or scrapbooking etc. Each page has four thicker strips, two thin ones and four circles. I bought a pack of plain and some with cool details ( e.g. the sticker has ticket stubs, barcodes, music on them ).
I used the stickers to redo the dividers to something more suitable for my needs. I'll use the rest as I continue to use it.
 |
| Remade Filofax dividers |
Then I had a little fun with the washi tape. I bought a cute panda one and some pretty yellow flower tape.
 |
| Washi tape |
I wanted some sticky notes in my filofax but the official one wasn't quite what I wanted plus I had some nice geometric ones already. So I made my own. I used a page from the Filofax as a template and cut out some thick paper to the correct size and punched in the holes. I don't have a 6 hole punch so I just marked the holes and did each one singularly. Using double sided tape, I added some of my sticky notes.
Of course, I then had to decorate it with washi tape!
 |
| Handmade filofax sticky notes |
For about the last 15 years, I've kept a list written out on the computer of all the books I've read. The list is in the 1000s at the moment. I can remember a lot but can't always remember if I've read a particular novel in a series so I like to have the list with me. So I don't accidentally buy the same book twice - it has happened!
With that many books, it would take forever to write by hand and probably fill up the Filofax. So I cut out different colours of Filofax sized paper out and with a little trial and error managed to print the list out back to back in a teeny tiny font. I managed to get it down to 10 pages.
 |
| Filofax book list |


Comments
Post a Comment