Photo Tutorial: Estonian Cast On
I've recently been looking into different cast on methods. I've tried quite a few and they've all got their purpose but I have taken quite a fancy to the Estonian Cast On (a.k.a. Double Start, Latvian). It's quite simple to execute, it's stretchy and can be quite decorative too.
It works well with 1 x 1 and 2 x 2 ribbing because it wraps around the base of the column of ribbing. It's a super cast on for socks.
It works well with 1 x 1 and 2 x 2 ribbing because it wraps around the base of the column of ribbing. It's a super cast on for socks.
The tutorial is for the single strand method.
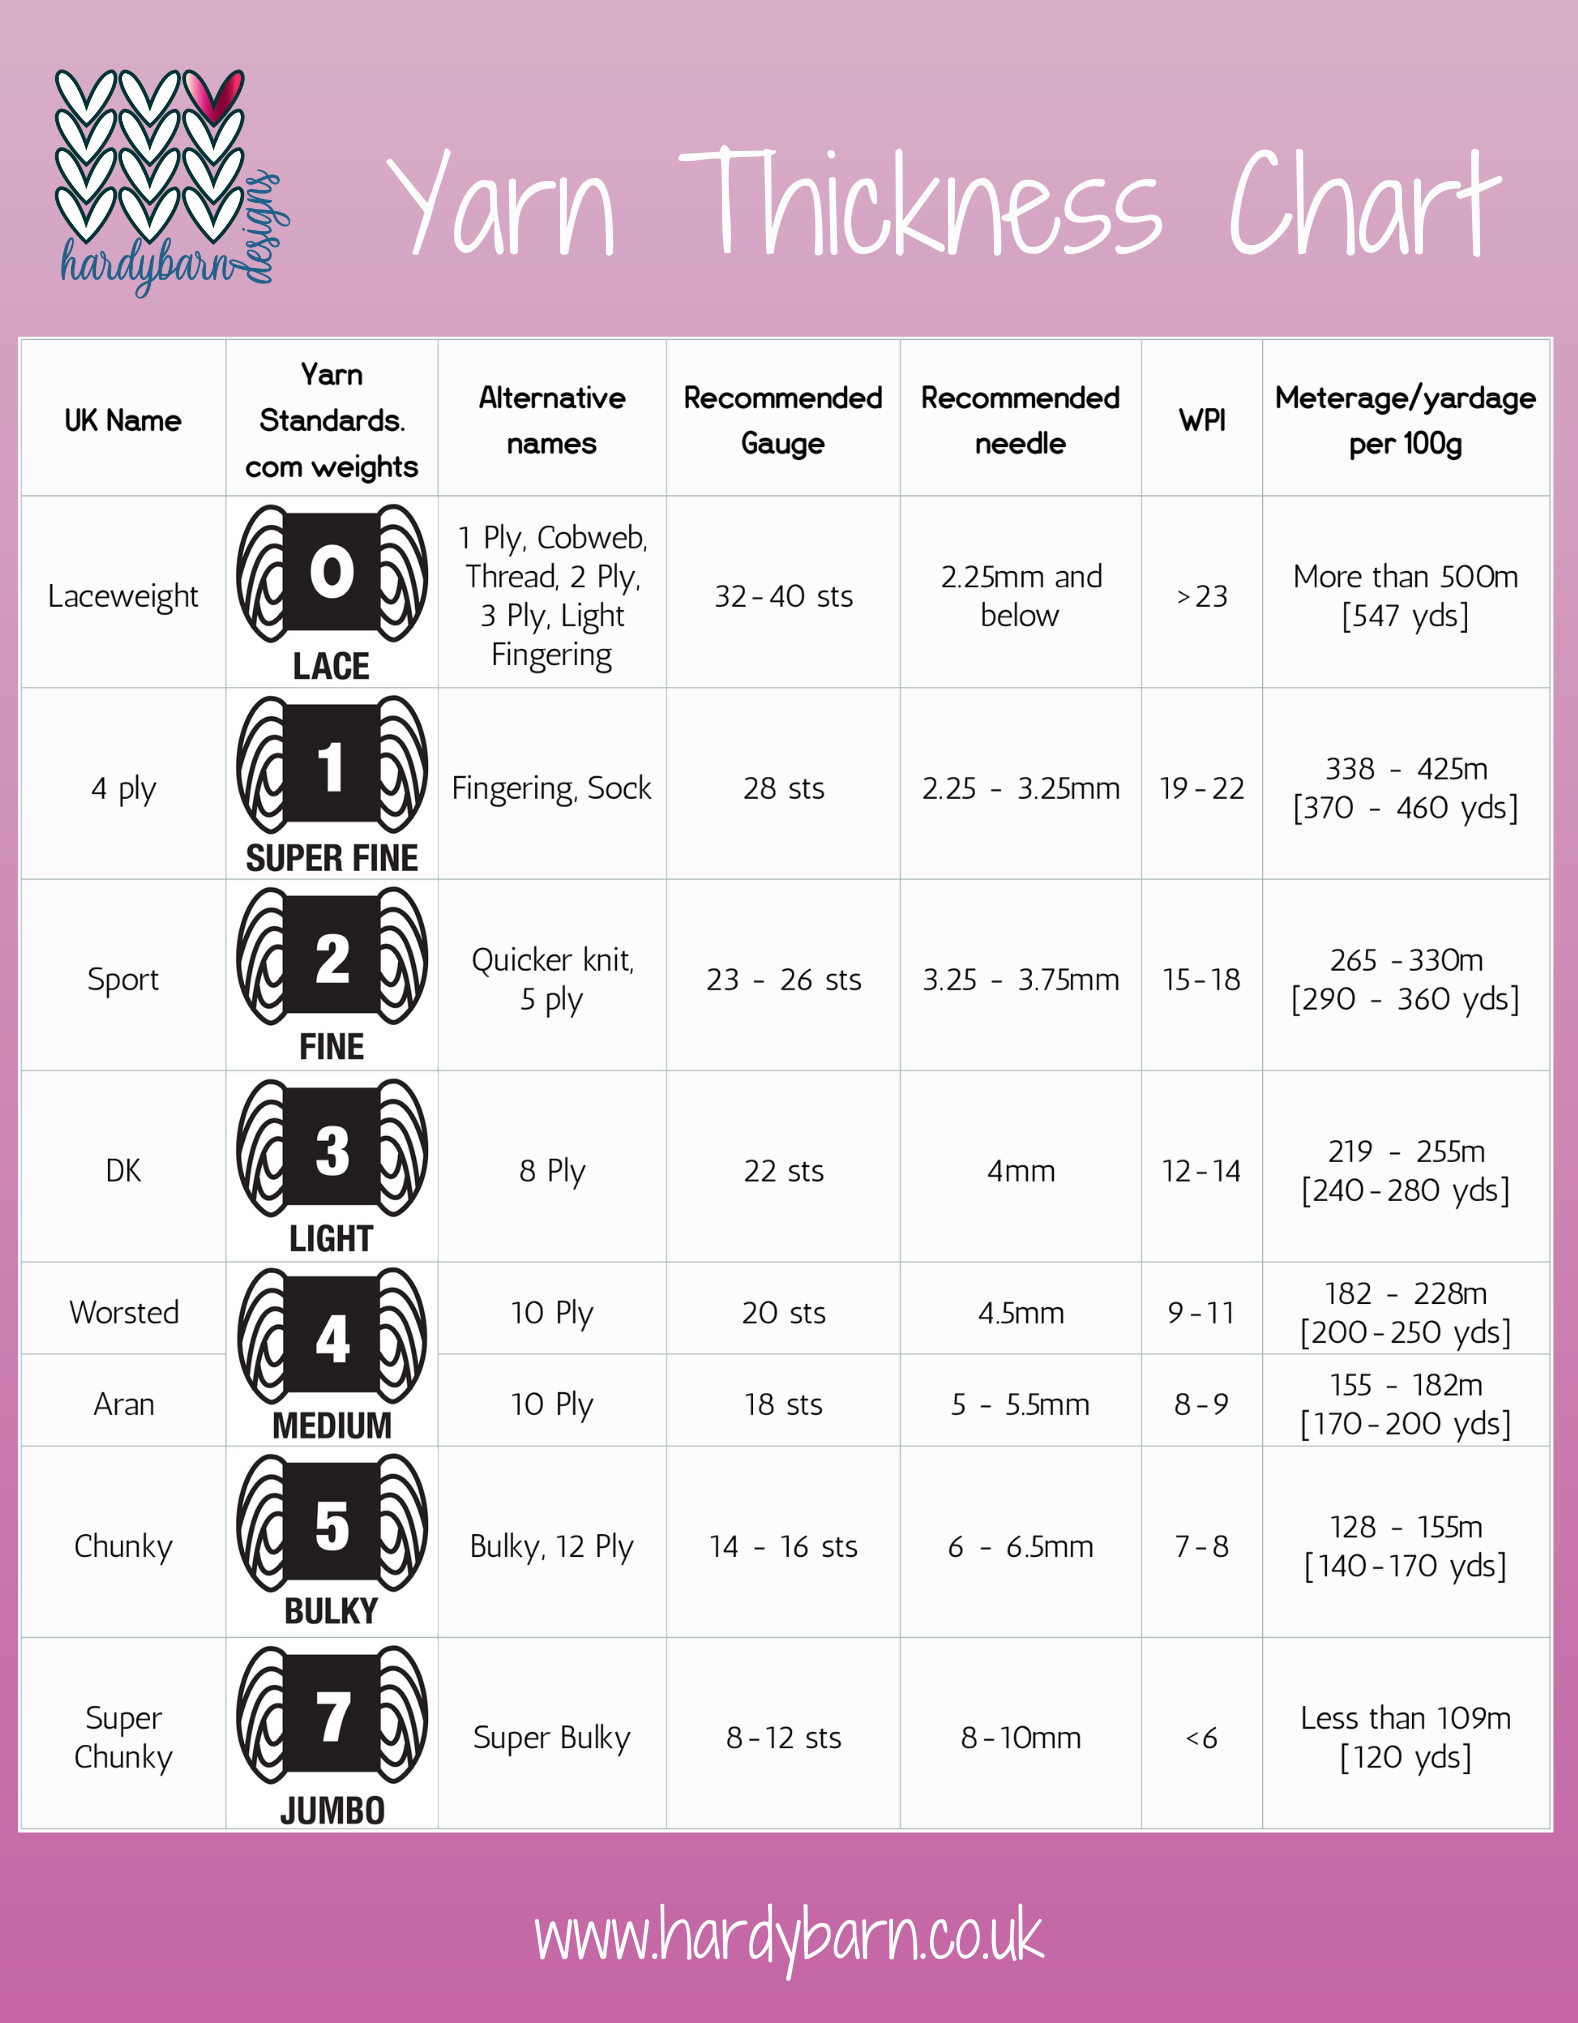
1. Measure out a long tail. I tend to use 1 inch per stitch for thicker yarn and 1/2 inch per stitch for DK weight and thinner; plus another 6 inches for luck! Make a slip knot and place on your needle.
2. Place your fingers between the strands and tilt your hand back into a catapult position. This creates a cross on the thumb strand.
3. Insert your needle into the loop around your thumb from below.
4. Reach across over the top of the strand on your forefinger.
5. Scoop this loop back through the loop on the thumb.
6. Drop the thumb strand and tighten the stitch onto the needle (not too tight though). You may recognise the previous steps, as it's the same as a regular long-tailed cast on.
7. Here's where it's different to the long-tail cast on. Now place your hand back into the sling shot position but wrap the thumb yarn clockwise around your thumb.
8. Insert your needle into the loop on your thumb from top to bottom.
9. Reach across over the top of the strand on your forefinger.
10. Scoop this loop back through the loop on the thumb.
11. Drop loop from the thumb and tighten stitch onto needle. (again, not too tight). There should be a bar across the base of these two stitches.
12. Repeat steps 2-11 until you have your required number of stitches.
This method can also be done with two strands of yarn around the thumb. This creates a thicker, more decorative edge.
I'm definitely going to use the Estonian Cast On for my next pair of socks.


Wow, an extremely informative blog ! Thank you for the work you do to present these tutorials. (I must say, I was quite bowled over by your schematic drawing with Adobe illustrator !)
ReplyDeleteGreat step-by-step photos. I like the Estonian Cast-on, and want to thank you for your excellent tutorial! Warmly, Jan
ReplyDeleteThank you, Jan. That means a lot especially coming from you, I have several of your wonderful books.
Delete