Photo & Video Tutorial: Magic Loop Cast-On
There are many different techniques for working in the round. One of my favourite techniques is magic loop.
Benefits
- Less joins than DPNs, so less ladders
- Ladders are less likely to happen
- The needles are attached to each other, so you can't lose one down the side of a train seat! You just need to ask my friend, Julie, about that one!
- If the stitch count changes, then nothing needs to change with the needles. Unlike using small circulars or DPNs
- As the stitches are split in half, this lends itself particularly well to socks, mitts etc. For example, the heel stays on one half and the instep stitches on the other, none of the stitches need to be put on holders or moved about
- For the same reason, you don't need to use as many stitch markers as the ends of the needles mark the natural halfway points
- Just move the knitting onto the cables and there's no chance of losing any stitches when it's in your bag
- You don't get DPNs stuck up your sleeve!
Downsides
- Can take a bit of time to get the hang of it
- More joins than using a 9" circular
- Have to move the needles every half round
- Can take a bit of practice to get the tension even at the joins
My preference for learning a technique is photo tutorials but I know a lot of you like a video. So I've done both. Here's the YouTube video on how to cast on for magic loop with lots of hints and tips along the way.
And for those that prefer a photo tutorial.
Materials needed: a circular needle 50/60cm longer than circumference of knitting. For socks, use 80cm [32"] circular needle. My needle brand preference is the Chiaogoo Mini Twist Interchangeables because the wire is very fine with no memory and the tips are a pleasure to work with.
Magic Loop Set-Up
- Cast on all stitches onto one needle tip. Most of the time, circular knitting requires a stretchy cast on. Twisted German Cast-On is my favourite.
- Move all the stitches onto the cable.

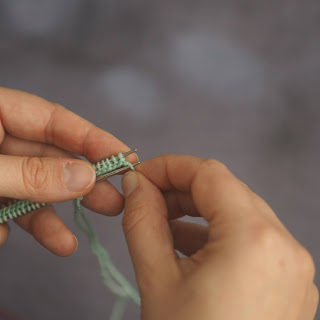
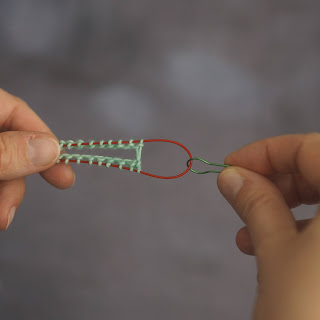
- Find the halfway marker between your stitches. Recommend adding a lockable stitch marker between the stitches - just be careful not to catch any of the yarn.

- Pull the cable through at this point. If using a thick or tough circular needle, this can be a bit difficult; fold in two at this point and it's easier to get through. If you used a stitch marker, then you can just pull the stitch marker to pull the cable through.
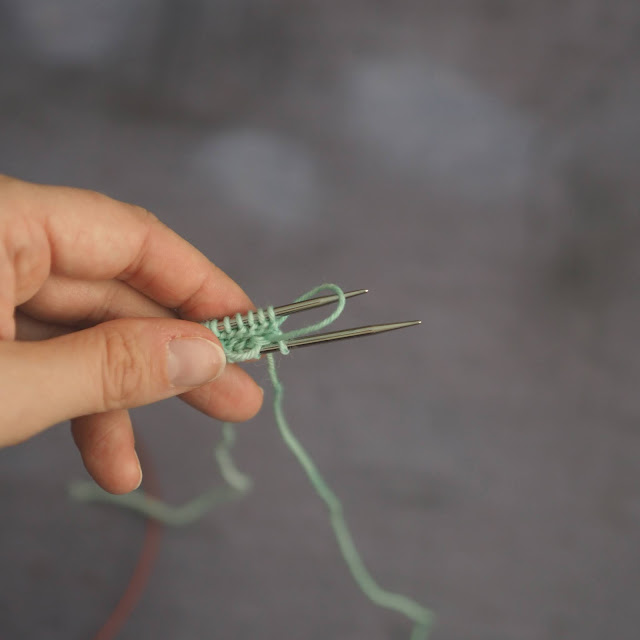
- Move all the stitches back up and onto the needle tips. Half will be on one needle and half on the other.
- Point your needles to the right. Chances are you'll have a twist in the cast on, like in the photo below.

- Ensure the cast on has no twist by moving the cast on edge to the centre and then holding the knitting with needles together to stop it re-twisting. You can start knitting from this point but I like to swap the first and last stitch to close the join.
- If you want to swap the first and last stitches, flip the needles so the working yarn is on the front needle.
- Take the slip knot (the first stitch cast on) off the back needle and move it to the front one. If you have a slip knot then this can be taken off the needle and it won't run.


- Once that stitch is moved, loosen the stitch that is attached to the working yarn and take it over the one just moved and off the front needle.
- Place this on the back needle.
- Pull up the working yarn to tighten this stitch, making sure that it sits at the end as you do this.
 |  |
Every time you have an empty needle (including the first time)
- Point the needles to the right and ensure the working yarn is on the back needle.
- If starting with a purl stitch (or anything where the yarn should be at the front), then leave the yarn hanging down.
- If starting with a knit stitch (or anything where the yarn should be at the back, then flip the working yarn over the top of the back needle.
- Pull the needle with the working yarn on (back needle) to the right until half the cable is on each side.
- You're ready to start knitting your round. Just remember each needle is only half a round.


Comments
Post a Comment